Studio apartment room dividers should solve one clear problem: a bed visible from the entrance, a work area beside the sofa, or a sleeping zone that needs a little more privacy. Choose the lightest intervention that solves it. A divider that cuts off the window or makes the only route feel like a corridor may cost more useful space than it creates.
Start with the furniture layout, then decide whether a partition is necessary. Our long, narrow studio layout guide covers whole-room arrangements. This guide compares boundaries within a layout, not seven more versions of the same floorplan.
In this guide
Choose studio apartment room dividers for one clear problem
Write a short problem statement: “I want the bed less visible from the front door” is more useful than “I need separate rooms.” Walk through the studio and identify the exact view you want to interrupt. You may only need a small screen at one edge of the bed, not a wall across the full width of the apartment.
Be realistic about the result. A screen, curtain or open shelf mainly provides visual separation; it is not a soundproof wall. If you need different people to work, sleep and entertain at the same time, consider how the household uses the room rather than expecting a decorative partition to solve every conflict.
Map daylight and routes before placing studio apartment room dividers
Mark the entrance, window, kitchen, bathroom and storage doors on a simple plan. Draw the route you use between them. Then place the proposed divider footprint on the plan, including its feet, open panels or furniture depth. Check door and drawer movement on both sides.
Stand where you would sit or work and look toward the window. A low or open boundary may preserve borrowed daylight better than a tall solid screen. Height is not the only issue: opaque baskets filling every shelf opening can make an open bookcase behave more like a wall. Test the actual arrangement you would use.
Compare the divider types before buying
| Option | What it gives you | Trade-off |
|---|---|---|
| Open shelving | Visual boundary plus useful storage | Depth, stability and required anchoring |
| Folding screen | Movable visual privacy | Angled panel footprint and stability |
| Curtain | Flexible open or closed view | Approved support, fabric clearance and ventilation |
| Sofa back | Low living-zone boundary | Limited privacy |
| Low cabinet | Storage and partial separation | Door access and furniture footprint |
| Rug and lighting | Zoning without a partition | No physical privacy |
Choose studio apartment room dividers for the problem you identified, not for the largest apparent transformation. A folding screen may be ideal for a short sightline, while open shelving is more useful if the studio also lacks a home for books and everyday objects.
7 studio apartment room divider ideas
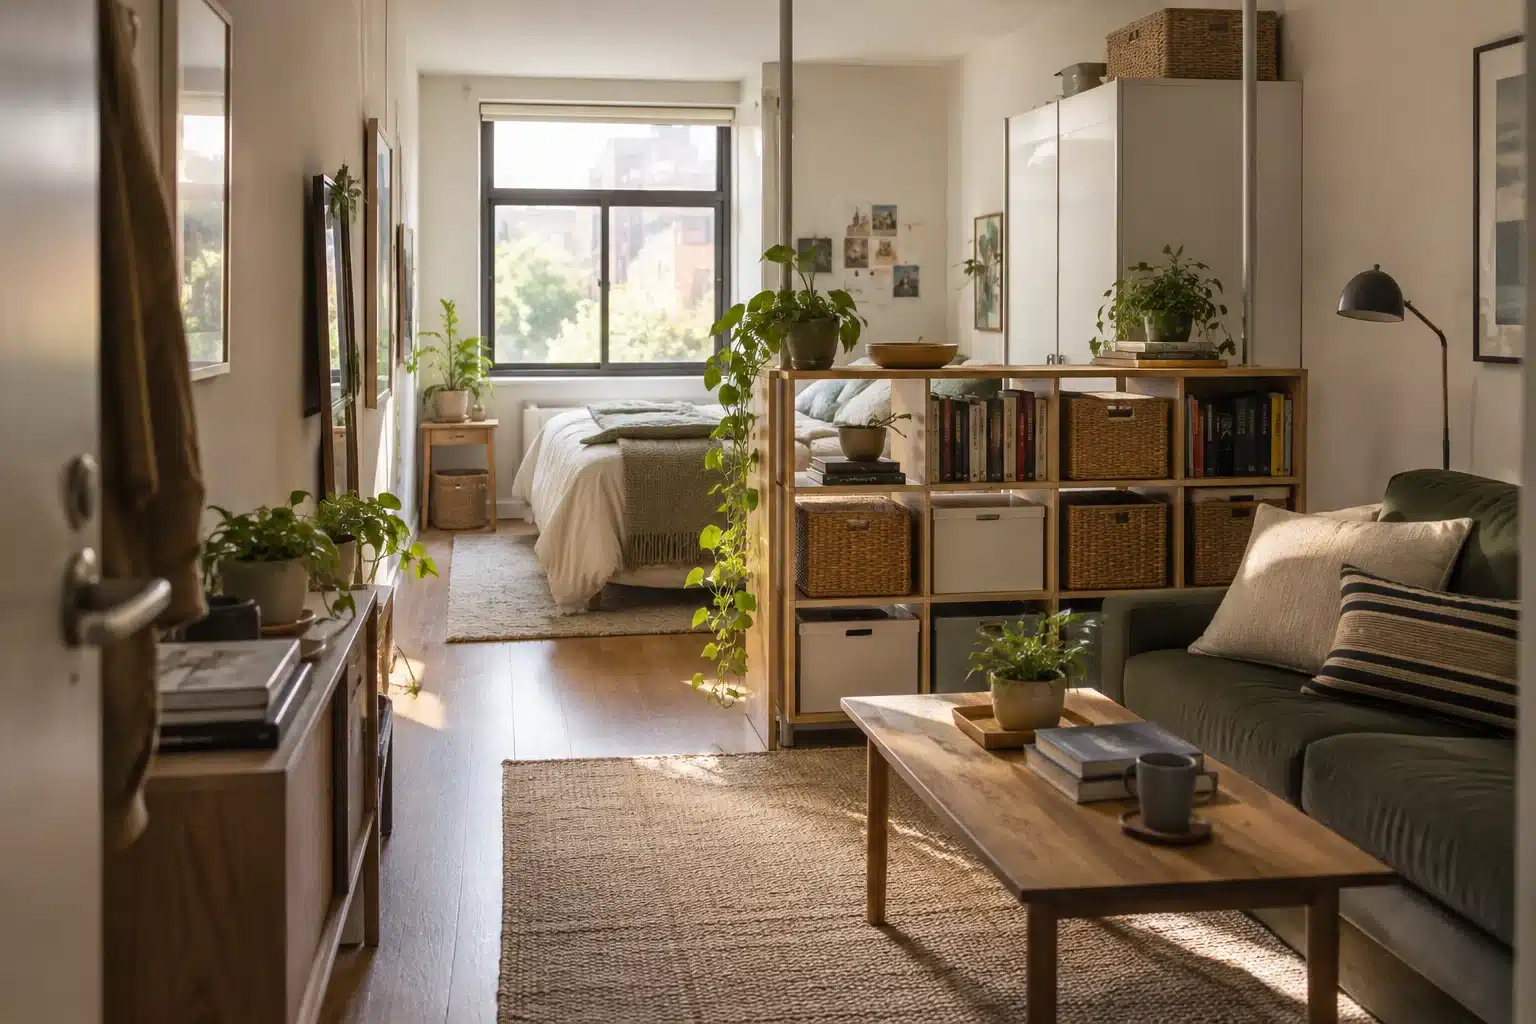
1. Use open shelving without filling every gap
A shelving unit can mark the sleeping zone while keeping some connection to the rest of the room. Put useful storage where it is accessible from the side you use. Keep the arrangement within the furniture’s rated loads and follow anchoring instructions. A shelving unit intended to be secured to a wall is not automatically safe floating in the middle of a room.
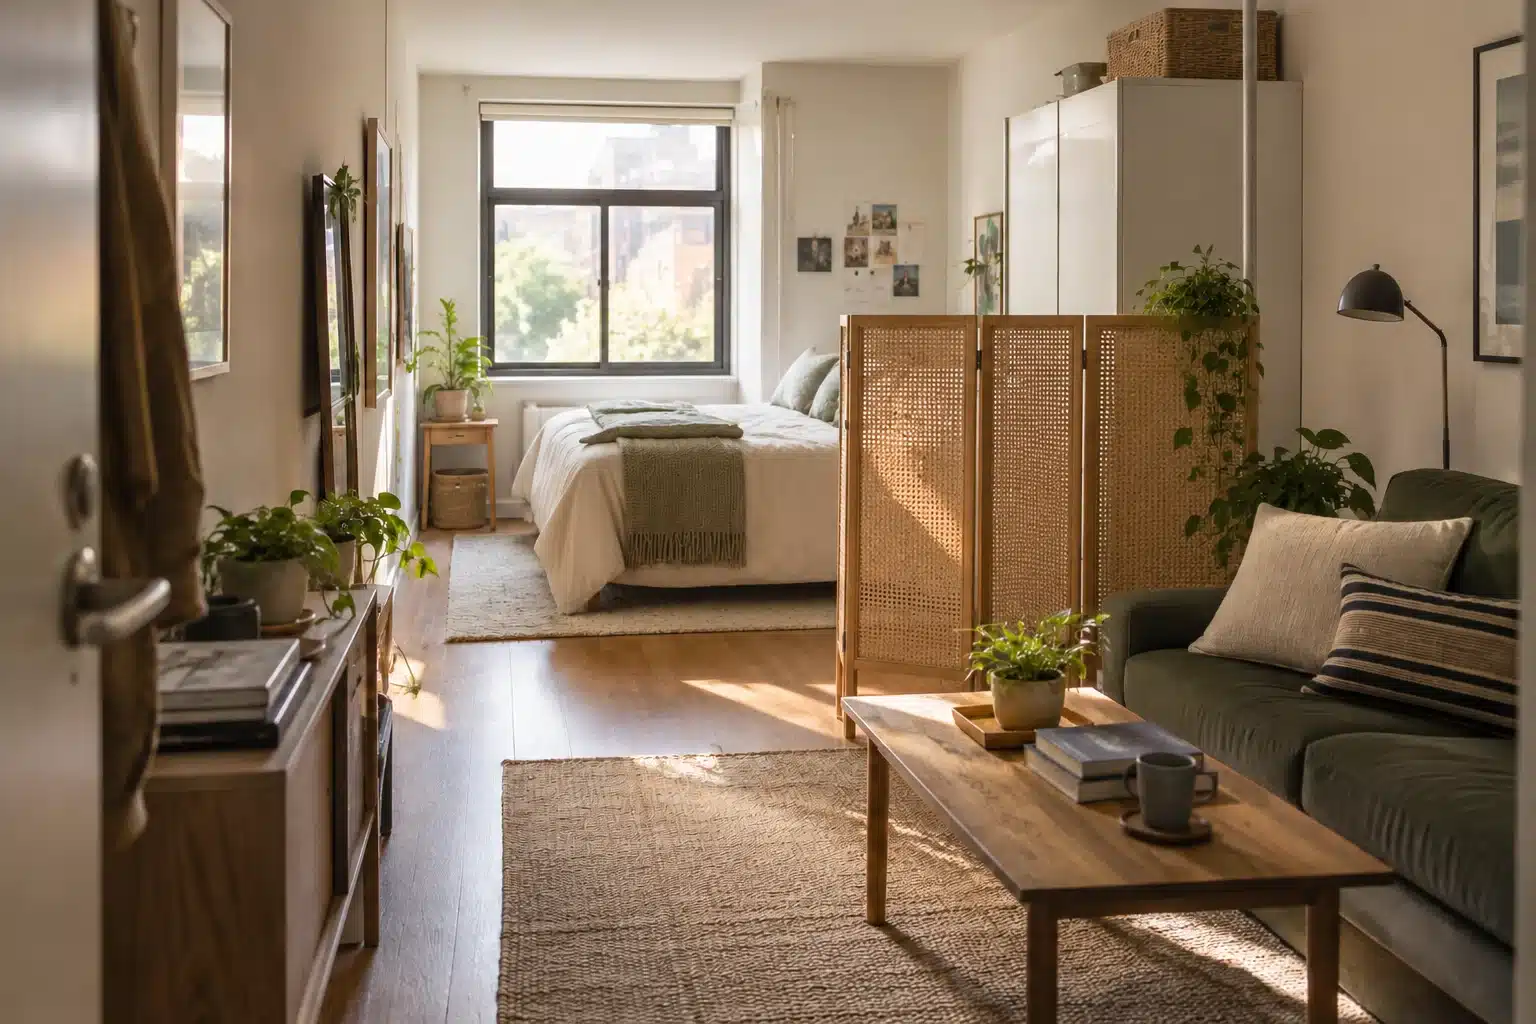
2. Position a folding screen on the troublesome sightline
Angle the panels according to the product’s instructions so the screen stands stably. Its operating footprint is wider than the thickness of one panel. Place it where it interrupts the entrance-to-bed view without blocking the route. Check the screen in ordinary use, including movement past it and access to nearby storage.
3. Try a curtain when you have an appropriate support
A curtain can open during the day and provide visual separation later. Confirm installation permission and a suitable support rather than improvising a heavy track or tension fitting. Keep fabric away from heating equipment and do not enclose required ventilation or escape routes. A curtain is a layout tool, not a substitute for a compliant room partition.
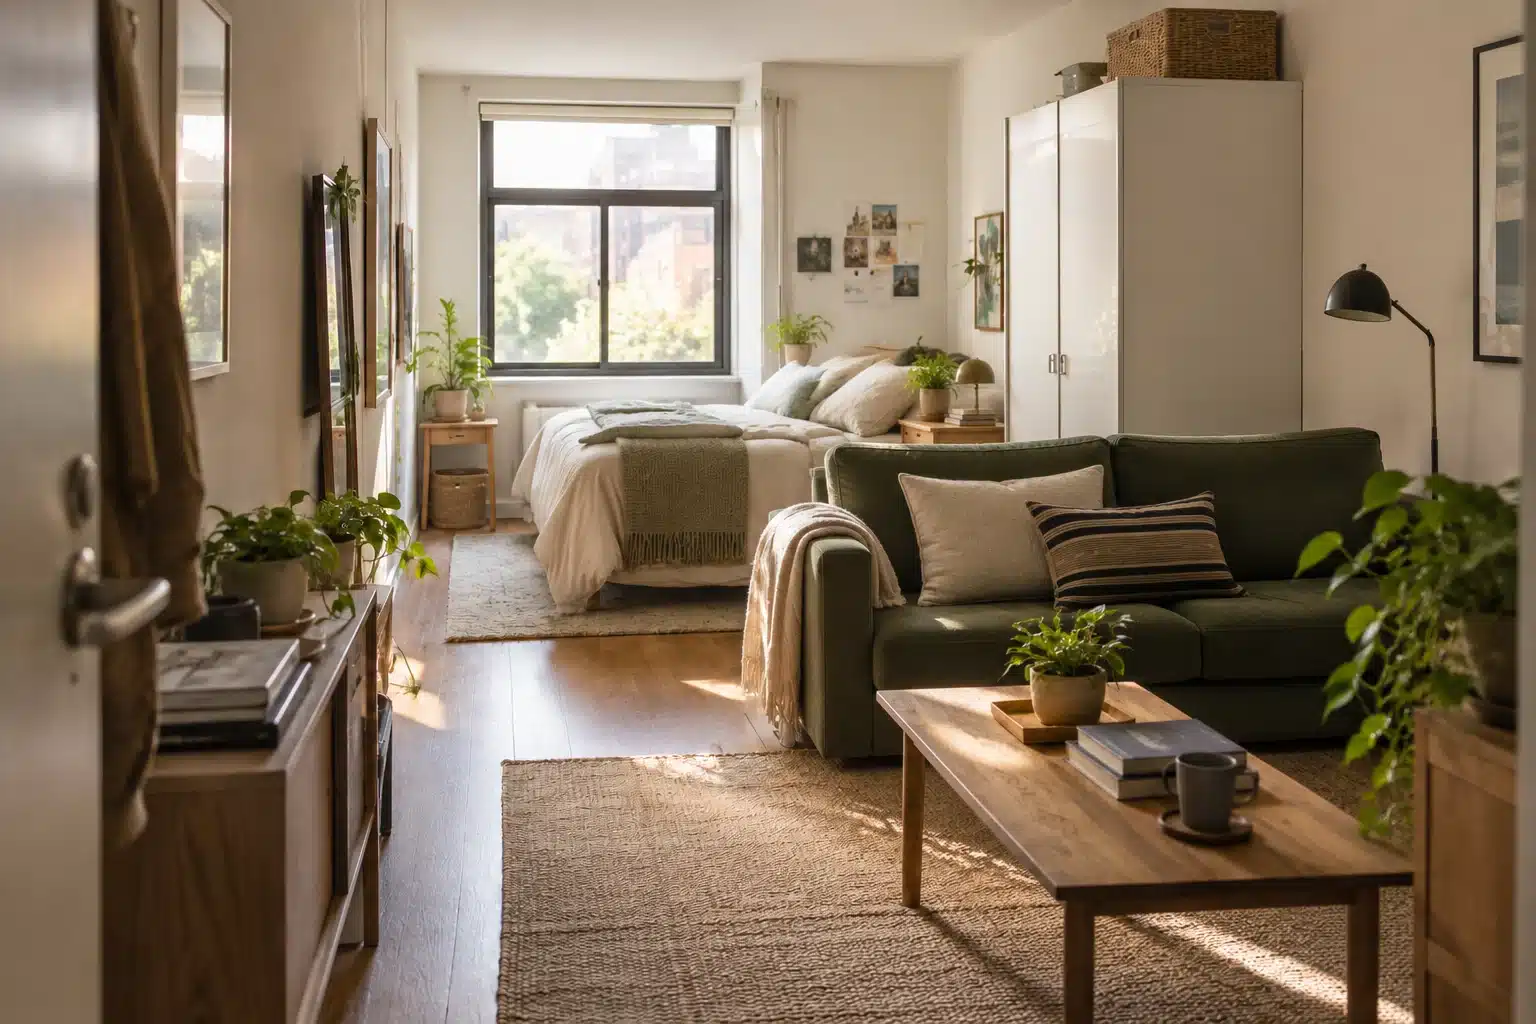
4. Let the sofa back define the living zone
Reposition an existing sofa before adding another object. Its back can mark where lounging begins, while a clear side route connects the sleeping zone. Check that the sofa remains usable and does not create an awkward narrow strip behind it. This gives gentle separation rather than concealing the bed completely.
5. Use a low cabinet for storage and partial separation
A low unit can keep the view open while giving everyday objects a home. Measure the open doors or drawers on the side they will face. Avoid buying a cabinet that becomes inaccessible against a bed or sofa. Consider stability and the manufacturer’s installation instructions even when the furniture is lower than a full bookcase.
6. Define zones with a rug and a useful light
A rug beneath the seating area and a separate task light at the desk can make the room feel organized without a partition. Keep rug edges out of troublesome routes and manage cables safely. This approach is worth testing when the actual problem is visual muddle rather than privacy.
7. Use a shorter boundary instead of dividing the whole width
A partial divider near the bed head or desk edge may be enough. Leave a deliberate opening connected to the main route, not a leftover gap behind furniture. Check the view from multiple positions, because a screen that conceals the bed from the entrance may still block daylight at the desk.
Trial studio apartment room dividers before changing the floorplan
- Identify one view or activity to separate.
- Record the main door-to-window and bathroom routes.
- Mark the divider’s full operating footprint.
- Test furniture access with nearby doors and drawers open.
- Compare window light from the bed, sofa and desk.
- Choose the lowest-impact solution that works.
Use existing furniture or temporary floor markers for the trial; do not build an unstable makeshift screen. Observe the arrangement through a normal day. A boundary that looks good from the doorway can be inconvenient while carrying laundry, making the bed or putting shopping away.
If studio apartment room dividers make the room cramped, shorten or lower the boundary before shrinking every other piece of furniture. If the bed is still too visible, adjust the divider’s position along the sightline rather than assuming more height is the only answer. The decision should come from the room’s actual use.
Safety and rental limits
Follow furniture instructions for anchoring and load. The CPSC provides furniture tip-over guidance; do not omit required fixings to make an arrangement seem renter-friendly. Ask the property owner about approved installation when necessary, or choose a different product designed for the available conditions.
Keep exits, necessary window access, appliance ventilation and heating clearances usable. Do not turn an inspiration image into an unapproved enclosed bedroom. The illustrations in this guide compare visual arrangements; they do not establish building-code compliance or acoustic performance.
Compare studio apartment room dividers from the entrance, sofa and work chair. Mark the sightline you want to interrupt on a sketch, then place the smallest suitable boundary across that line. Draw its full support footprint and the movement of nearby drawers. A screen that hides the bed from one point may still leave the desk in shadow or prevent a cupboard opening.
Test the proposed boundary with floor markers and existing furniture where suitable. Do not balance loose panels to imitate a screen. Walk past with laundry, reach stored belongings and make the bed. If those actions fail, shift the boundary along the sightline or shorten it. Keep the solution only when it improves the particular view while supporting normal use of the room.
A worked folding screen comparison for an entrance-to-bed sightline
Imagine a studio where the bed is visible from the front door but the sofa and desk already fit comfortably. The resident wants to interrupt that one view. Draw a line from the entrance position toward the part of the bed to conceal. Place a small folding screen outline across that sightline, then draw the route around it. This asks the room dividers to solve a defined visual problem. It does not assume a fully separated sleeping room is necessary or possible.
Use the folding screen’s intended open configuration and complete support footprint. A three-panel product standing in a shallow zigzag occupies more depth than a flat panel. Follow its instructions for stable use; do not assume it can stand nearly flat because that shape saves space on paper. Check whether a nearby wardrobe can open and whether you can reach the bed. If the screen must move for each ordinary action, compare a shorter boundary or another position along the same sightline.
Now compare open shelving that might interrupt the same view. Include the unit’s depth, any required installation and access to the shelves from the intended side. Add a few actual contents to the plan instead of imagining a permanently empty shelf. Opaque boxes can change how much borrowed light passes through the unit. If the shelving is unsuitable for the proposed freestanding use or cannot be installed as required, remove it from the shortlist. A useful storage feature does not override its intended installation conditions.
Finally compare the existing sofa back or a low boundary. These room dividers may provide enough distinction without concealing the whole bed. Look from the entrance, sofa and work chair rather than one camera position. Note whether the chosen boundary changes the view you care about and whether the window still feels available to the activities beside it. Keep the smallest suitable intervention that supports the daily actions. A more complete-looking division can introduce a larger footprint without adding a function the household needs.
Compare open shelving, curtains and furniture boundaries in daily use
Open shelving adds storage only when those shelves remain reachable. Put the proposed book or basket group beside the relevant side of the unit on your drawing. Check how you remove the largest object and where you stand to do it. A shelving divider between the sofa and bed may face the wrong direction for the objects stored there. Compare a rotated unit or an existing wall-side shelf rather than forcing the collection into the divider because capacity is available.
A curtain has a different set of operating states. Draw it open and closed, including where fabric gathers. Check the intended support, its installation requirements and any permission needed before buying. Ask what needs to change when the curtain closes: lighting, ventilation access or movement past the bed. A folded curtain still occupies a location rather than disappearing. Compare that packed location with a folding screen’s stored footprint when deciding which approach matches your use of the room.
Furniture placement may already give the room sufficient organization. Try pointing the sofa toward its main activity and place a lamp for reading there. Keep the desk facing its work area and define its supplies home. This can distinguish activities without adding room dividers. If the bed remains visible but that visibility is not causing a practical problem, a new partition may have little work to do. Make the decision from the specific privacy or organization need rather than the number of zones shown in a saved image.
If open shelving makes the room darker than expected, check its loaded arrangement. Several dense baskets in the upper shelves may close the openings through which light was supposed to pass. Move suitable contents elsewhere or reconsider whether the shelving belongs across that view. Lowering or shortening a boundary can help preserve a connection to the window, but the actual result depends on the room and furniture. Test from where you read and work. A brighter entrance alone does not establish that the desk remains comfortable.
If a folding screen catches on ordinary movement, trace the action causing the conflict. Carry laundry past it, reach the wardrobe and make the bed. The feet or angled panels may occupy space absent from an inspiration photograph. Move the screen along the sightline only where its stable configuration and required routes still work. If no position does, choose a different boundary or accept a more open room. Room dividers should earn their footprint by solving the view while preserving the activities around it.
Choose a rental-compatible divider from an actual installation plan
Before ordering, write the proposed product, position, required support and installation method. Separate freestanding products designed for that use from shelving that requires restraint and curtains that need a suitable fitting. Clarify what the property owner permits when installation affects the apartment. If a required attachment is unavailable, compare another designed solution or use furniture placement. Keep the plan specific enough to check against the product instructions. This makes the room divider decision concrete without pretending that a temporary-looking item has no installation requirements.
Test the boundary at the times the studio is actually shared
For a shared studio, run the divider trial while two ordinary activities occur. One person might read beside the sofa while the other retrieves clothing or works. Check whether a folding screen interrupts the intended view and whether both people can move normally. Discuss which problem remains. If the unresolved problem is sound, do not keep increasing the divider height as though visual separation will necessarily address it.
Compare the open and stored states when room dividers move during the day. Write where the folding screen waits, how its panels are arranged and whether that state still permits storage access. For a curtain, check where gathered fabric sits. For open shelving, evaluate the permanent loaded footprint because the contents make moving the unit a different task. A flexible-looking boundary is useful only when each state has a workable location.
Keep a brief decision record: the view to interrupt, the chosen product or furniture boundary, its full footprint and the access checks completed. Include any installation condition still unresolved. If the room becomes cramped after another purchase, refer to that record before assuming all room dividers need replacement. The new conflict may be the added table or a basket filling a shelf opening rather than the original boundary itself.
Finish by viewing the room from your usual seated positions with ordinary belongings present. Check whether the open shelving is still serving useful storage and whether the folding screen is placed for a real sightline. Remove a boundary whose purpose has disappeared after the furniture arrangement changed. The studio can remain organized through clear activity positions even when a previous partition is no longer needed.
Questions about studio apartment room dividers
What divider is best for a dark studio?
Start with a low boundary, an open solution or no partition at all. Check the window view from the positions where you spend time. A tall divider can reduce useful light even when it occupies little floor width.
Can a bookcase be used without anchoring?
Only if the manufacturer’s instructions permit that exact use. Do not assume a loaded bookcase is safe because it feels heavy. If the required fixing cannot be installed, choose a suitable alternative rather than ignoring it.
Will a curtain stop noise from the living area?
It can change the appearance and may alter some room acoustics, but it is not equivalent to a sound-isolating wall. Avoid treating visual privacy and sound privacy as the same requirement.
Do I need a divider in every studio?
No. Furniture arrangement, a rug or separate lighting may give enough distinction. Add a divider only when it solves a specific problem without compromising the room’s useful space.
Plan the rest of the studio
Use our long, narrow studio layouts and cozy small-apartment ideas for the wider arrangement. IKEA’s studio planning examples offer additional visual zoning ideas; verify the instructions for any furniture you select.