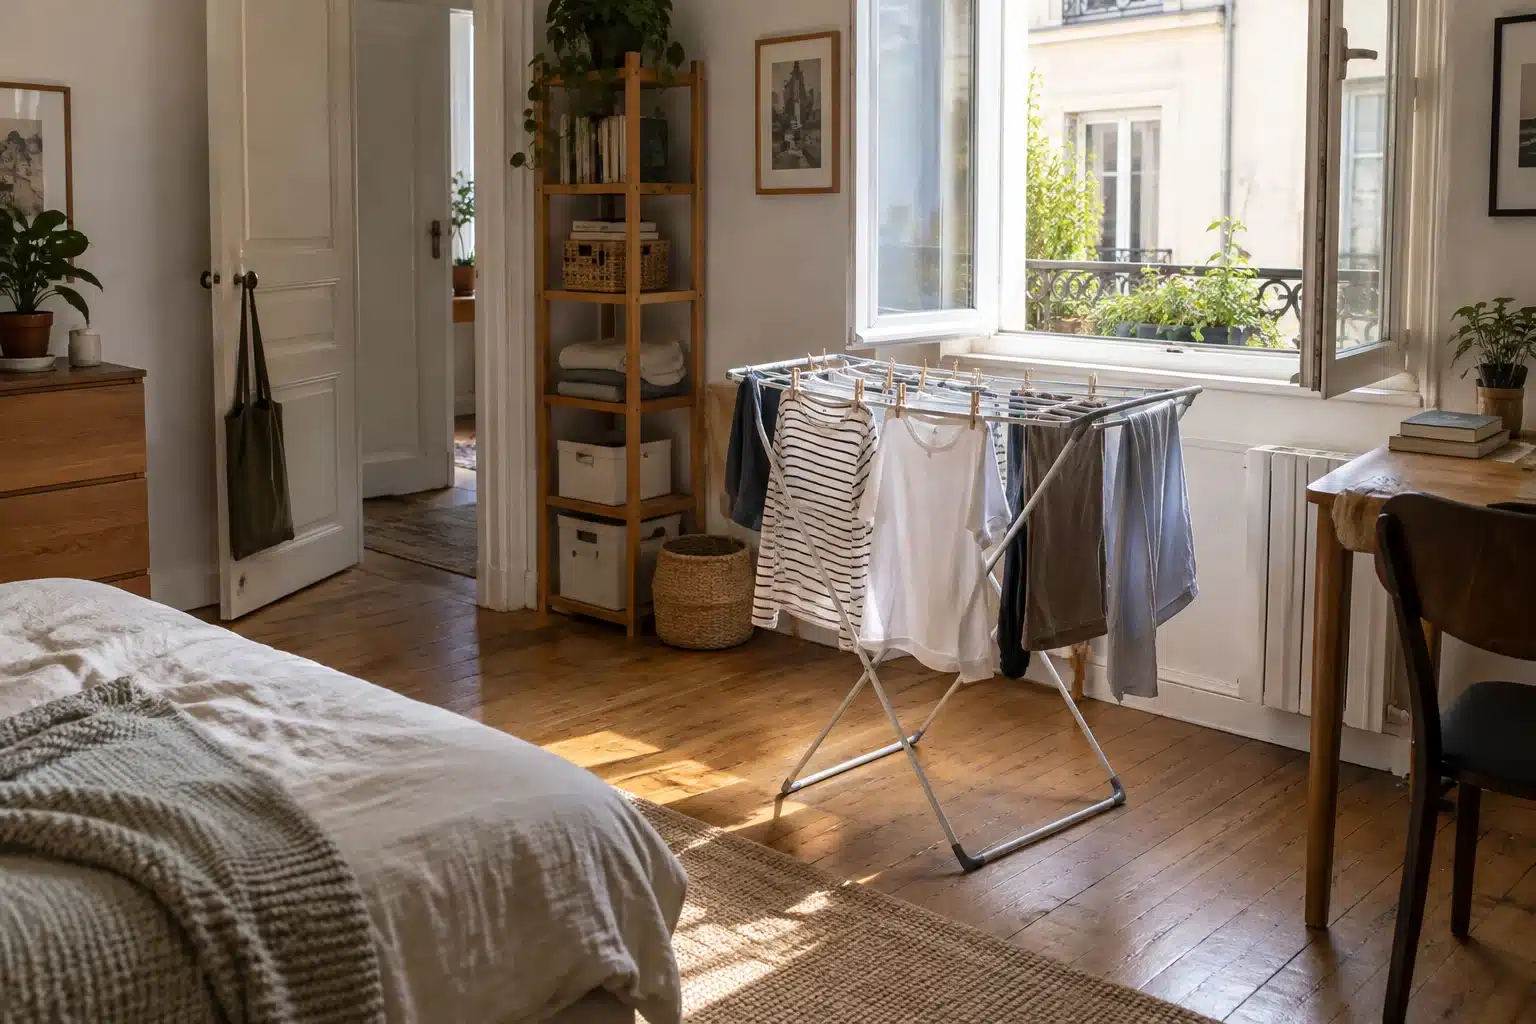
Drying clothes in a small apartment is easier when you plan two footprints: the space occupied by a rack during drying and the place it lives afterward. Choose the smallest rack that suits your ordinary load, leave air gaps around garments, and keep doors and daily walking routes clear. A rack that folds flat but has nowhere to be stored is only half a solution.
Indoor drying also adds moisture to the room. Where an appropriate outdoor location is available and permitted, consider it first. When indoor drying is necessary, make moisture removal part of the plan rather than assuming a sunny window guarantees suitable conditions. Our small laundry-room planning guide covers the separate tasks of loading, sorting and putting clothes away.
In this guide
Plan drying clothes in a small apartment before choosing a rack
Look for a location with room around the garments and a workable way to ventilate or otherwise manage moisture. Do not position a rack across the exit, an essential window, a heater’s required clearance or appliance access. Include the widest garment and projecting rack wings in your measurement. A product’s folded depth does not describe the space it occupies during use.
Test the position with the rack open. Walk past it carrying a basket, open nearby doors and use the furniture normally. If you have to relocate it whenever you sit down or leave the room, consider a different size or location. A smaller load that can dry properly is often more practical than a large rack squeezed into a route.
Compare drying options by their real footprint
| Option | Useful situation | Check first |
|---|---|---|
| Folding floor rack | Flexible use in a room | Open wings, stability and storage afterward |
| Vertical tower rack | Limited floor width | Air gaps, load balance and reach |
| Suitable hanging rail | Shirts on hangers | Rated support and drip-safe location |
| Installed wall rack | A dedicated utility area | Permission, wall fixings and projection |
| Shared or outdoor facility | Bulky loads or limited indoor conditions | Building rules, access and weather |
A vertical rack is not automatically better. Several closely packed levels can make it difficult to spread larger garments. Compare the usable hanging arrangement with the laundry you actually wash, not a capacity label that assumes only small items.
7 ways to make a small drying space work
1. Match the load to the available drying area
Before washing a bulky load, check where every item will hang. Bedding and heavy towels can consume most of a small rack. Use an appropriate shared facility or a different wash schedule if the whole load would otherwise be piled onto limited bars. Do not solve a capacity problem by covering every nearby piece of furniture with wet fabric.
Trial the ordinary garment mix before starting the wash. Drying clothes in a small apartment is easier when every item has an appropriate position already planned. Keep a separate arrangement for bulky bedding if it would monopolize the usual rack.
2. Use the garment’s care instructions
Some clothes can hang, while others need flat drying to avoid stretching. Follow the care label, and use a suitable laundry program. A higher spin setting may remove more water from compatible fabrics, but it is not suitable for every item; check both the garment and washing-machine instructions rather than using one setting for everything.
Group garments by their actual drying needs before assigning supports. Drying clothes in a small apartment may require both hanging and flat positions during the same load. A rack with plenty of bars still needs a suitable plan for items whose labels call for flat drying.
3. Give fabric air space
Spread compatible garments over separate supports and leave a gap between layers. Shake out suitable items so thick folds do not remain pressed together. Space sleeves and towel folds rather than hiding them beneath another garment. Use pegs or hangers only in ways that suit the fabric and the rack’s design.

Look at the loaded rack from both sides. When drying clothes in a small apartment, a shirt that looks separated from the front may overlap another garment behind it. Spread suitable pieces within the rack instructions and adjust the load rather than filling an already crowded section.
4. Keep drips and damp fabric away from finishes
Choose a location that suits the amount of moisture present. Do not allow garments to drip onto wood furniture or rest against walls. Avoid laying laundry directly over a radiator, heater or electrical appliance; the appliance’s instructions and required clearances take priority over a convenient drying surface.
Include the longest hanging garment in your location trial. Drying clothes in a small apartment should not put a towel hem against upholstery or let a sleeve reach a heater. Check the loaded arrangement instead of relying on the empty rack outline.
5. Manage moisture, not just temperature
Opening a window may help when conditions permit, but heating a closed room does not itself remove water from the home. Use appropriate room ventilation. If a dehumidifier is suitable, follow its placement, drainage and operating instructions, and keep it clear of fabric and splashes. Persistent window condensation or damp surfaces are reasons to reassess the arrangement.
Notice the room conditions during an ordinary load and reassess if condensation or damp surfaces increase. Drying clothes in a small apartment requires a suitable moisture-removal plan as well as rack space. Ask the property manager about unresolved building ventilation issues before adding more indoor drying capacity.
6. Rotate suitable items without crowding the rack
During ordinary household use, check whether thicker areas or overlapping folds are drying more slowly. Reposition compatible garments to expose those areas rather than adding another wet load. Drying time varies with fabric, moisture, spacing and room conditions; a precise promise such as “everything dry in two hours” would be misleading.
Check thick seams and folded areas before calling a garment dry. Drying clothes in a small apartment can progress unevenly across one load. Keep items needing more drying separate from the finished stack and follow their care instructions instead of using a fixed time promise.
7. Put away both clothes and equipment
Return completely dry laundry to its normal storage zone, then fold and store the rack in its designated position. Keep it stable, away from the exit and clear of heating or ventilation equipment. If it is awkward to retrieve or constantly falls over, change the stored location rather than leaving it permanently open in the room.

Agree on the destination for dry clothing before the rack is loaded. Drying clothes in a small apartment releases floor space only when the garments leave and the empty equipment returns to a stable stored position. Include that last handoff in your normal laundry routine.
A workable routine for a one-room apartment
Use one modest load as a test. Set up the rack first, identify the route that must remain open, and check where a flat-dry item would go if needed. After washing, place larger compatible pieces first and add small items only where there is genuine remaining space. Keep wet laundry separate from bedding and upholstery.
- Check care labels and plan a load that fits the drying area.
- Open and stabilize the rack in the chosen location.
- Hang compatible garments with visible air gaps.
- Use suitable ventilation or other moisture control.
- Check slower-drying folds during normal use.
- Return dry clothes and pack away the rack.
Notice the actual bottleneck. If the rack works but putting laundry away takes days, improve the wardrobe or drawer routine. If condensation increases, change the drying arrangement or moisture management. If bedding monopolizes the room, use a separate appropriate solution for that load. One rack does not need to solve every laundry situation.
When indoor drying is not the right answer
If the available location stays damp, blocks safe movement or cannot provide suitable conditions, consider a permitted outdoor area, building laundry facility or other appropriate drying option. More racks do not remove the moisture generated by more wet clothing. A small apartment may need different arrangements for everyday clothes and bulky household textiles.
ENERGY STAR’s dehumidifier guidance discusses moisture management and advises considering outdoor drying when a dryer is not used. Use manufacturer instructions for any equipment; this guide does not prescribe a dehumidifier capacity or replace building ventilation requirements.
A drying worksheet and a one-room trial with mixed garments
| Record for your own room | Your notes |
|---|---|
| Care-label needs for the ordinary garment mix | ________________________ |
| Open drying rack dimensions including projecting wings | ________________________ |
| Longest hanging piece and any flat-dry position | ________________________ |
| Door, window, heater and appliance access to preserve | ________________________ |
| Suitable moisture removal and current room conditions | ________________________ |
| Rack support, stability and load instructions | ________________________ |
| Basket transfer and drip-sensitive surrounding finishes | ________________________ |
| Separate plan for bulky bedding or towels | ________________________ |
| Stable rack storage and dry-clothes destination | ________________________ |
Use the worksheet before the wash begins, including any garments still being worn that commonly join the load. Record the drying rack when occupied, not just its folded size or bare frame. Keep the flat-dry position separate if needed. The resulting plan describes your household and room conditions; it does not promise a particular drying time or replace equipment, garment or building instructions.
Imagine a one-room apartment where a folding drying rack can stand near a suitable ventilation position, while the bed and main route occupy most of the floor. The household washes shirts, a pair of trousers and occasional towels. Before starting, they trial the open rack with comparable dry garments to understand their projection. The empty bars alone do not show where hems and sleeves will hang.
The trial reveals that one long piece crosses the route when hung at the outer wing. The household changes its appropriate position and rechecks access to the door and ordinary furniture. If the rack still obstructs movement, a smaller manageable load or another suitable drying location is needed. A narrow drying rack does not solve the conflict if its loaded garment outline remains wider than the available drying space.
Now introduce an item whose label requires flat drying. The household checks whether an appropriate stable flat position exists under that care guidance. Closely spaced hanging bars are not automatically equivalent to a suitable flat-dry arrangement. If that item uses much of the available drying space, schedule the load accordingly rather than assuming every mixed garment can share the same crowded rack.
Keep towel handling in the comparison. Several thick towels may occupy most of the drying rack and make it difficult to space other garments appropriately. The household considers a separate wash interval or an appropriate permitted facility for that bulky group. The aim is not to fit the maximum number of items onto the bars, but to give each compatible piece a workable place without covering nearby furniture.
For the actual load, follow both garment and machine instructions, then bring items promptly to their planned supports. Spread compatible pieces with gaps and keep damp fabric away from walls, upholstery, heaters and electrical equipment. Check the drying rack support and intended load arrangement. Its location should remain usable throughout drying rather than depending on repeated relocation whenever someone needs the room.
Moisture control is evaluated as part of this trial. Room heating does not itself remove the water released from fabric. Use suitable ventilation or appropriate equipment according to its instructions, and observe whether condensation or damp surfaces increase. If the room remains unsuitable, reconsider the indoor drying arrangement and use the appropriate property-management route for unresolved ventilation or dampness issues.
Check progress during ordinary household use without relying on a fixed-hour promise. Thick seams, layered areas and waistbands can need more attention than the exposed surface of a shirt. Reposition suitable items when their care and rack instructions permit. Keep anything still damp out of the completed stack. The drying space should not receive another wet load simply because several outer pieces appear finished.
Putting away is part of the plan. Give completely dry clothes a clear drawer, wardrobe or linen destination before loading the drying rack. If those spaces are already crowded, address the return step so finished garments can leave the room’s temporary drying space. Otherwise the rack becomes permanent storage even when the moisture-management and garment-spacing parts of the arrangement worked.
After clearing the load, return the empty drying rack to its measured stable home using its intended folding and storage method. Check projecting feet, wings or hooks in that stored shape. A location behind furniture is useful only if retrieval is manageable without moving heavy pieces. Keep it clear of required access and appliance instructions, just as you did while the rack was open.
Review the trial by naming its limiting factor. Too little usable drying space calls for a different load or appropriate location. Crowded fabrics call for better spacing. Persistent condensation calls for reassessing conditions and moisture removal. Dry clothes waiting for days call for a better receiving destination. Use that evidence to choose the next change; another drying rack cannot automatically solve all four problems.
Keep a fallback for the load that does not suit the ordinary drying space. Check any permitted outdoor or shared facility arrangement before washing bulky bedding, and include its availability in the schedule. If that option is unavailable, choose another appropriate method rather than leaving wet textiles crowded across furniture. The drying rack used for everyday clothing does not have to handle every household item.
Where several people share the room, agree on when the rack can be deployed and who completes the return step. Keep the daily route usable throughout that time, including the normal evening furniture arrangement. A workable schedule helps prevent overlapping loads, but it cannot make a physically obstructed or persistently damp drying location suitable. Recheck the conditions and loaded footprint when the garment mix changes.
Keep a short trial record beside the worksheet: the garment mix, rack arrangement, moisture-removal method and any unresolved problem. Write observations such as “towel fold stayed damp” or “sleeve crossed the doorway,” rather than a single success score. Those details tell you what to change next time. A different fabric mix or weather period can alter the result, so review the ordinary setup when conditions change instead of treating one successful load as permanent proof of suitability.
Questions about drying clothes in a small apartment
Can I dry laundry in a bedroom?
It depends on the available space and room conditions. Keep the bed, doors and necessary routes usable, avoid wet contact with furniture, and plan suitable moisture control. A bedroom is not automatically appropriate just because there is an empty corner.
Is a tower rack better than a winged rack?
Choose based on garment size, usable spacing, stability and the room’s footprint. A tower may use less floor width, but wide items can overlap between levels. A winged rack may spread larger garments better while needing more open space.
Can I put a drying rack next to a radiator?
Only where the heater’s required clearance and instructions permit the arrangement. Do not drape clothing over the appliance or let fabric touch it. The rack’s position must also avoid blocking safe movement and necessary airflow.
Should I buy a dehumidifier just for laundry?
Assess the room’s moisture conditions and available ventilation first. If one is suitable, compare equipment and operating guidance for that use; do not select it solely from a drying photograph. It does not make blocked exits or an overloaded rack acceptable.
Complete the laundry-to-storage route
See top-loader laundry-room planning for the washing stage and small closet layout ideas for putting clean clothes away. A clear destination for dry laundry makes a temporary drying setup much easier to maintain.