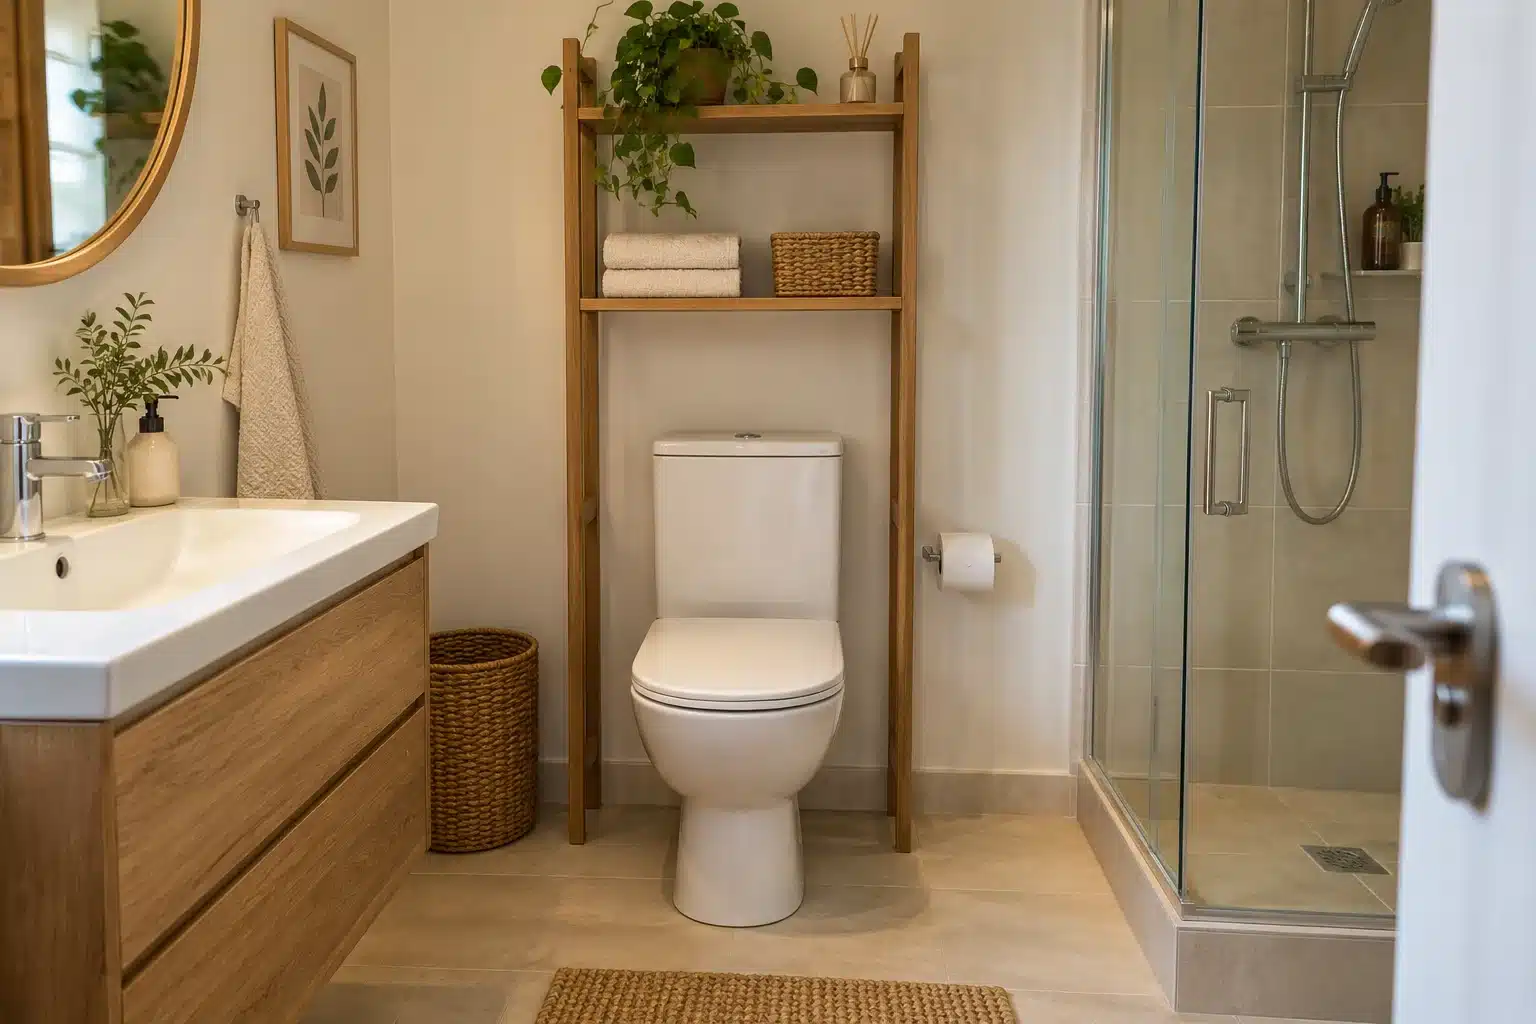
Over-the-toilet storage for small bathrooms can give light supplies a useful home, but measure the tank, service access and surrounding movement first. The unit must fit around the toilet without obstructing the seat, flush controls or water valve. Tall furniture also needs the secure installation specified by its manufacturer.
If the bathroom has several missing storage zones, begin with our guide to bathrooms without cabinets. For linens, use our small-bathroom towel-storage guide to separate dry backups from towels that need room to dry.
In this guide
1. Assess over-the-toilet storage for small bathrooms
Identify the toilet’s tank shape, flush controls and water connection. Note whether the seat and lid rise close to the tank or project farther back. Some toilets have concealed tanks or unusually shaped bodies, so furniture described as over-toilet storage may not suit them. Keep any manufacturer-required access panels usable.
Inspect the wall area for windows, electrical fittings, vents, tiles and pipes that affect positioning or installation. Look at the floor too: skirting, supply pipes and the toilet base can prevent unit legs sitting where the product diagram assumes. A narrow bathroom may have the right wall width but no suitable leg position.
Choose the contents of over-the-toilet storage for small bathrooms before choosing the unit. A few spare paper rolls and lightweight toiletries may justify a shallow shelf. A large collection of cleaning supplies, heavy bottles and towels may need different storage. Do not choose a tall unit merely because the wall above the toilet appears empty.
2. Measure over-the-toilet storage for small bathrooms
| Measurement | Where to measure | What it prevents |
|---|---|---|
| Overall usable width | Between nearby walls, basin and obstructions | Buying a unit whose outside frame will not fit |
| Internal leg spacing | Around tank, bowl and pipe positions | Legs colliding with the toilet or supply line |
| Tank and control height | Floor to the highest relevant component | Crossbar or shelf blocking normal flushing |
| Tank-lid removal space | The actual lift and removal movement | Storage trapping the lid during maintenance |
| Shelf projection | Wall to front edge including handles | Head contact or crowded movement |
| Unit depth at floor | Legs, feet and rear braces | Unexpected obstruction beside the toilet |
Make a fit record with separate entries for outside width, clear opening between the legs, lowest crossbar height, tank-lid removal space and valve access. Add shelf projection and cabinet-door movement. A unit passes only when the complete frame and ordinary servicing fit, not simply when its advertised width exceeds the tank width.
Product width is usually an outside dimension, while the gap between legs is smaller. Check both. A sample tank measuring 20 inches across does not automatically fit in a 22-inch-wide unit if the legs and frame reduce its internal opening. Use the actual technical drawing and assembly instructions rather than estimating from a lifestyle photograph.
Likewise, compare the height of the lowest crossbar, not only the first shelf. A brace can collide with a valve or pipe even when the shelves sit above the tank. Keep the complete product drawing beside your room measurements, noting any adjustable components and their allowed positions.
Worked example: outside width does not reveal the opening
Imagine a toilet tank 50 cm wide and an over-toilet unit advertised as 56 cm wide. The frame legs and side members reduce its clear opening to 47 cm. These illustrative dimensions show the problem: the headline width exceeds the tank width, but the frame still will not fit around it. Over-toilet storage needs the technical drawing and internal opening dimensions, not just a room photograph or overall width.
Next, compare the lowest brace with the valve and supply line. A brace might sit below the lowest shelf and create a conflict that the shelf-height description omits. Toilet storage shelves need their complete supplied frame. Do not remove a required brace to make the example unit fit. Check adjustable components only within the permitted assembly positions, and choose a different model if the complete structure remains incompatible.
The tank lid adds another movement. Use the toilet documentation and observe its required removal path where it can be checked safely. A shelf clearing the closed tank may leave no space to lift or move the lid for servicing. Over-toilet storage should preserve that access without requiring removal of installed restraints or dismantling the structure. Keeping loose objects off the tank top is useful but does not create missing vertical space.
Finally, check the user and room. Simulate sitting, standing, flushing and reaching for a lightweight supply. Include other household members whose reach or movement differs. Toilet storage shelves projecting into shoulder or head space can feel intrusive despite using little floor area. Compare an appropriate nearby location when the over-toilet position fails. The goal is reachable storage in a usable room, not filling every otherwise blank wall.
| Dimension or movement | Record separately | Why it matters |
|---|---|---|
| Overall unit width | Outside of the frame | Room footprint only |
| Clear opening | Between legs and members | Tank and toilet geometry |
| Lowest brace | Height and position | Valve, pipe and installation conflicts |
| Tank-lid path | Required lift and movement | Future service access |
| Shelf projection | Depth into occupied space | Ordinary sitting and standing |
3. Preserve tank access and ordinary toilet use
Follow the toilet manufacturer’s instructions for lifting or removing the tank lid when a tank is present. If safe to do so, observe the movement on your existing toilet and measure the space it uses. Some lids lift vertically before moving forward; a nearby shelf can obstruct either part. Do not balance a heavy ceramic lid in an unstable position while measuring.
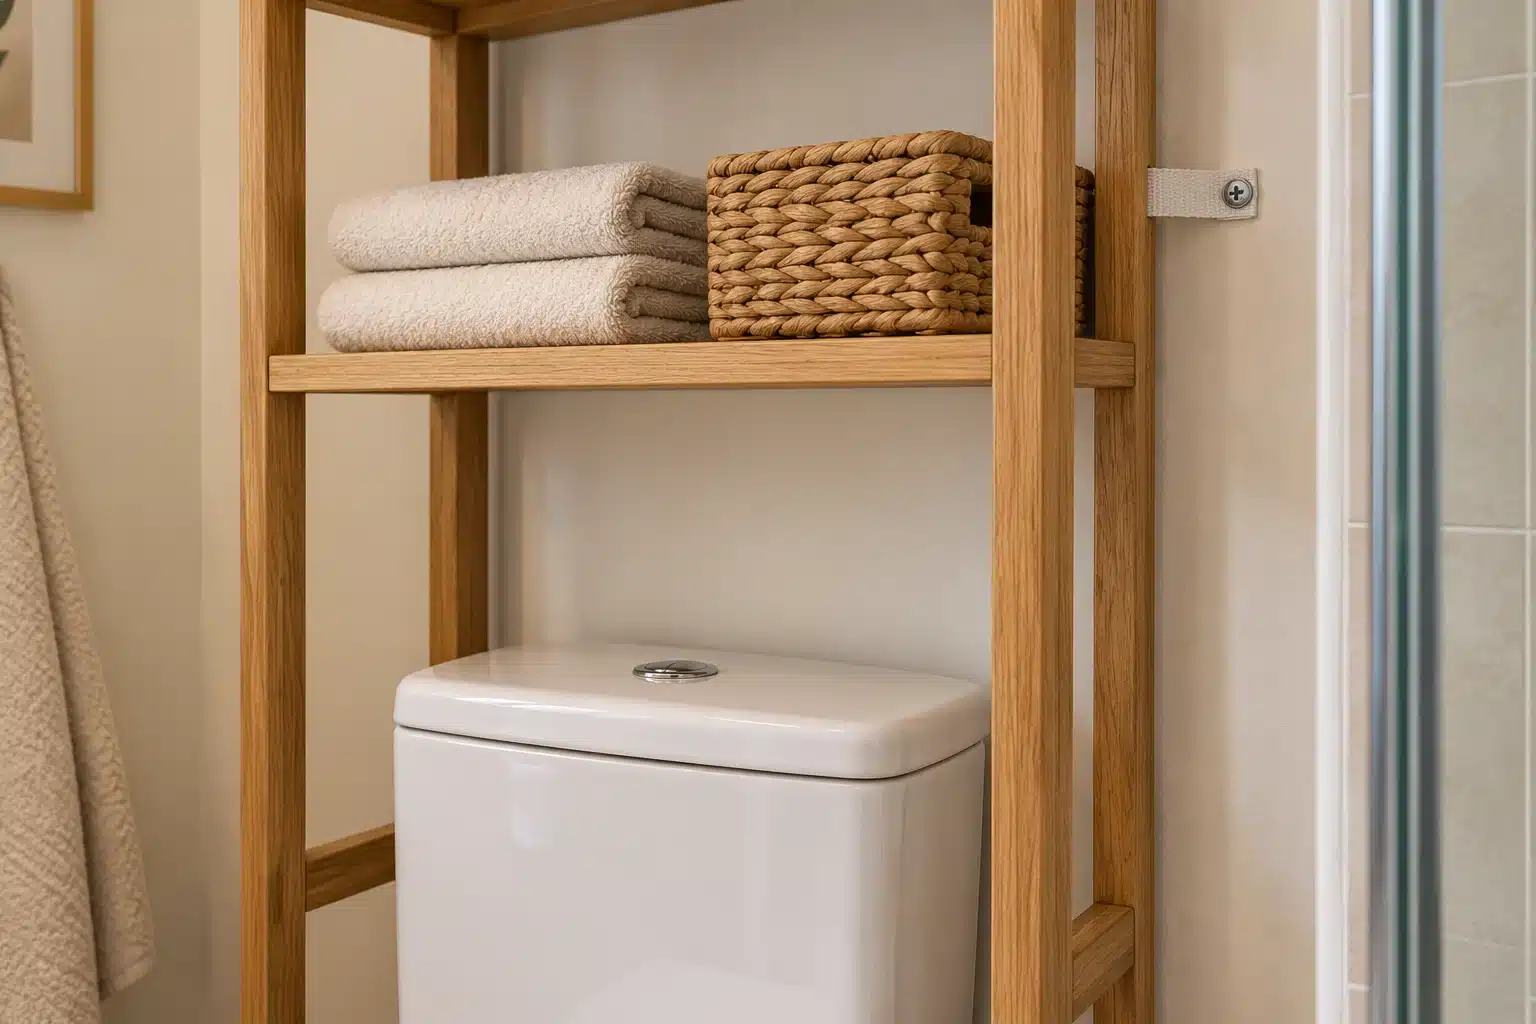
Check top-mounted buttons, side levers and other controls. Someone should be able to flush normally without reaching around a shelf support. Open the toilet seat and lid through their full ordinary movement. Include accessories such as an installed bidet seat only according to their documentation; their size and service requirements may change the fit.
Locate the shutoff and consider maintenance around the base. A unit that must be dismantled to reach a valve is a poor match. Removing a few lightweight stored items for servicing is different from undoing wall anchors or structural braces. Choose a shallower or different arrangement if the furniture traps essential access.
4. Compare standing units, wall shelves and cabinets
A purpose-made standing unit avoids mounting every shelf individually, but still occupies floor space and may require wall anchoring. Its legs and braces need to fit around the toilet. Open shelves keep items visible, yet small products can fall unless the shelf design or containers hold them securely.
Wall-mounted shelves leave the floor open and can be placed around specific obstructions when the wall and installation allow it. They need appropriate fixings and a load rating suited to the intended contents. Shelves above a toilet should not become an improvised heavy-storage platform. Renters need the relevant permission before installing them.
A wall cabinet can conceal supplies, but add its door swing and handle projection to the plan. Consider whether you can open it without standing awkwardly over the toilet. A deep closed cabinet can feel intrusive even when its floor footprint is zero. Access and room use matter as much as storage volume.
When over-the-toilet storage for small bathrooms does not fit, compare a nearby shallow cabinet. Using another section of wall avoids forcing a unit around an incompatible tank. Compare it with the whole room rather than assuming the over-toilet location must be used because products are sold for it.
A practical comparison before buying toilet storage shelves
List the lightweight supplies that benefit from being near the toilet and the items that can stay in another suitable location. A small paper backup or a few appropriate toiletries may need less capacity than an entire linen inventory. Over-toilet storage works best with a defined limited job. Keep cleaning products according to their labels and household access needs rather than assuming an open shelf is appropriate for every bottle.
Mark the proposed frame feet and shelf projection with removable planning materials, then remove those materials after the check. Include wall baseboards, the toilet base and any floor obstruction. Walk through entry and ordinary cleaning movements. Toilet storage shelves may have a larger practical occupied area than their top shelf suggests. A cabinet also needs its open-door area; closed dimensions alone do not establish access.
Check installation requirements before comparing prices. A standing unit may need securing to the wall, while a mounted shelf needs suitable fixings and wall conditions. Follow the actual model instructions and obtain relevant rental permission where required. Over-toilet storage that cannot be installed correctly is not a workable purchase. Do not compare it as a low-cost alternative while silently leaving out necessary components or installation.
Compare the best compatible unit with using an existing dry shelf elsewhere. Consider retrieval frequency, complete footprint, installation, maintenance and the quantity you intend to store. Toilet storage shelves are useful when that location truly helps the routine. They are unnecessary when a nearby existing home for replacements solves the same job with simpler access. Delay decorative additions until the useful contents and cleaning routine have passed the trial.
5. Follow the unit’s anchoring and load instructions
Freestanding does not mean safe without securing. IKEA’s FRÖSJÖN over-the-toilet shelf guidance, for example, states that the unit must be secured to the wall using fixings suitable for the wall material. This is a product-specific requirement; consult the instructions for your own unit and follow any required anti-tip installation.
Do not substitute adhesive pads for specified screws and anchors unless the manufacturer explicitly approves that method. If required mounting is not possible, choose storage that can be installed correctly in the available location. Adding weight on a shelf is not a substitute for anchoring, and towels placed on top do not make a tall frame more stable.
Check the shelf load limits, use the complete structural frame as supplied and position contents as directed. Do not omit a brace to clear plumbing or remove lower members to widen the opening. An alteration that solves geometry may change stability. For uncertain wall construction or concealed services, arrange suitable installation advice before drilling.
6. Choose light contents for over-the-toilet storage for small bathrooms
Reserve the most comfortable shelf in over-the-toilet storage for small bathrooms for lightweight supplies accessed regularly. A shallow bin can keep small items from spreading across open wire shelving, provided it fits securely and is easy to lift. Check whether a container’s bottom is properly supported rather than resting precariously between wires.
Keep a limited paper-roll backup and suitable dry toiletries in this zone. If you store clean towels here, confirm that they remain dry and accessible; damp towels need an appropriate drying position elsewhere. Avoid turning the top shelf into a heavy overflow zone. Reaching above the toilet with a large bottle or deep basket can be awkward even when the shelf itself can carry it.
Preserve product labels and use storage conditions appropriate to each item. Cleaning products need suitable secure storage where household access and their labels require it. An open over-toilet shelf may not meet those needs. Decorative glass and heavy objects also add avoidable consequences if knocked, so choose contents with retrieval and the location in mind.
7. Test the walking route and cleaning routine
Test over-the-toilet storage for small bathrooms by marking the proposed footprint and shelf projection with removable markers before installation. Walk into the room, use the basin and simulate sitting and standing at the toilet. Check that shelves do not project into your head or shoulders during ordinary movement. Include the bathroom door in both open and closed positions.
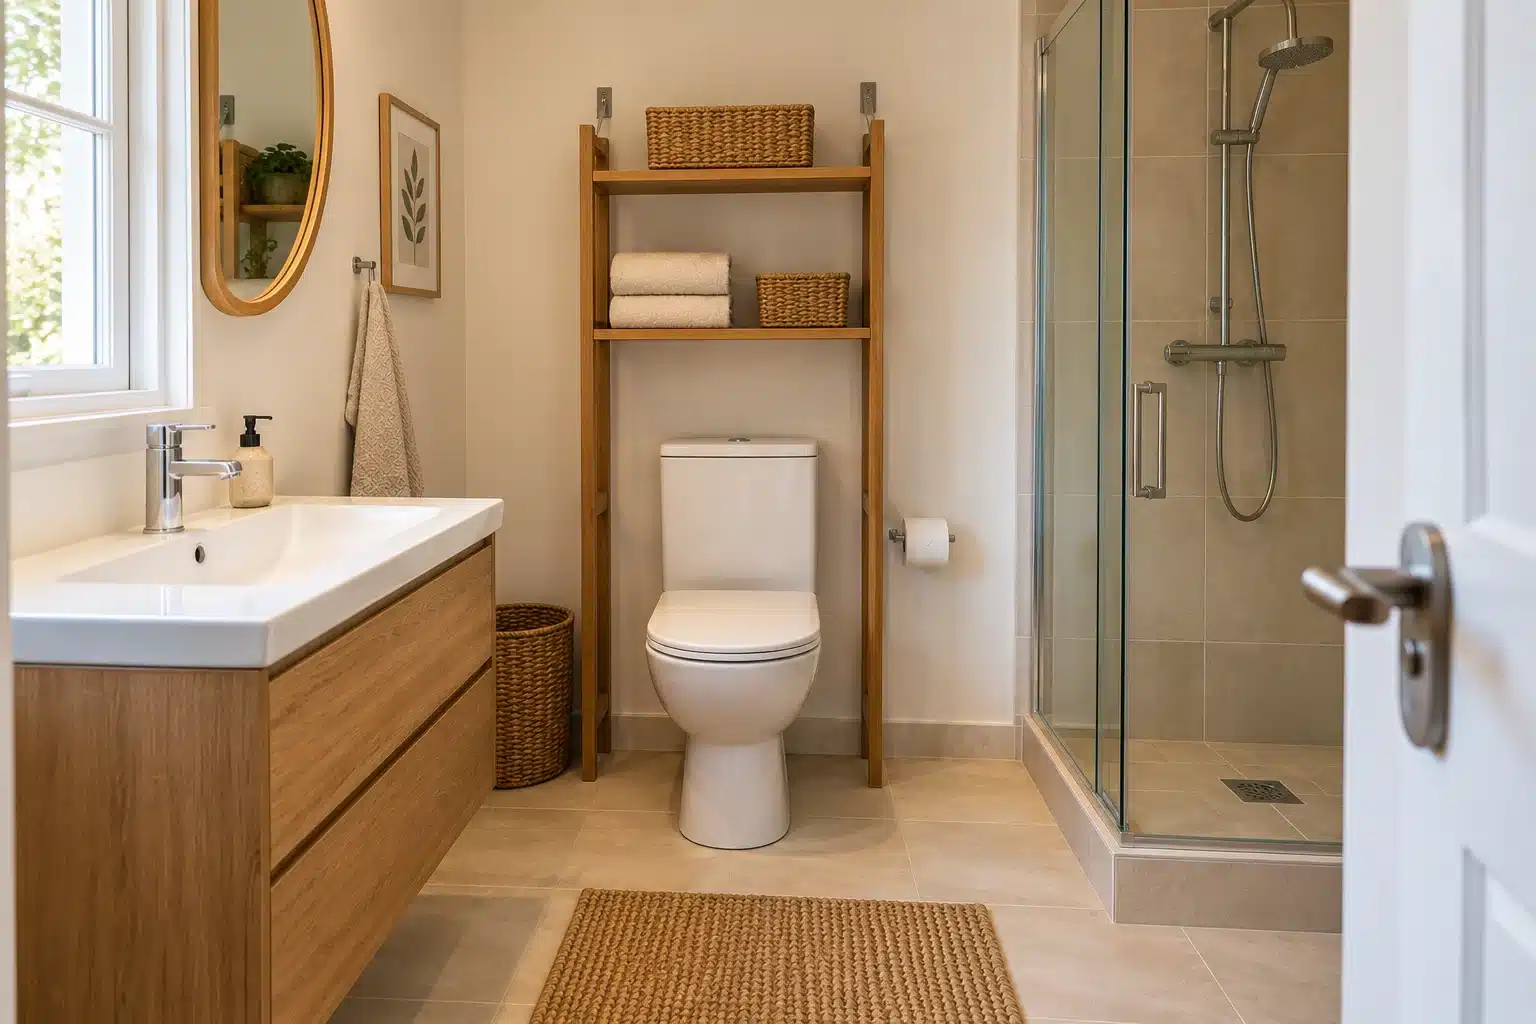
Test shared use too. The person who selected the unit may have a different height, reach or movement pattern from another household member. Mobility equipment and assistance needs change the required usable area. There is no single decorative-furniture clearance that resolves all bathrooms; preserve applicable building and accessibility requirements and test the actual room.
Consider cleaning access around the unit legs and behind the toilet. A deep frame can create narrow pockets that collect dust and are difficult to reach. Choose washable containers, follow product care instructions and avoid overloading shelves so routine cleaning requires less handling. Periodically inspect fixings and address looseness according to the manufacturer’s guidance.
Check the filled setup and ordinary servicing
Load only within the shelf and installation limits, placing suitable contents where the manufacturer directs. Keep heavier or awkward items in a better supported and more accessible location when appropriate. Over-toilet storage should not require reaching above the head with a deep basket while leaning across a fixture. A shallow manageable group can be easier to retrieve than a large box even when both fit the shelf.
If small items shift or fall between wire shelves, compare a suitable supported container with the exact shelf shape. Include the container in the load and retrieval check. Toilet storage shelves do not become more useful simply by fitting more containers side by side. Make sure each group can come out without knocking a neighbor and that the bottom remains properly supported rather than balancing across gaps.
If the unit makes cleaning difficult, inspect access around its feet, behind the toilet and beneath stored groups. You may need a shallower compatible frame, fewer contents or a different location. Do not move an anchored unit casually to clean behind it; follow its installation and maintenance instructions. Over-toilet storage should be chosen with the cleaning route already understood, rather than treating future disassembly as an ordinary housekeeping task.
If future servicing is obstructed, change the plan before treating the furniture as finished. Keep the valve and required access panels recognizable and preserve the tank-lid path. Review toilet storage shelves periodically for looseness or damage according to the maker guidance. A useful final record lists dimensions, installation documentation and the contents assigned to each shelf. Over-the-toilet storage for small bathrooms succeeds when normal use, maintenance and retrieval all remain workable.
| Filled-state check | Observation to record | Decision |
|---|---|---|
| Retrieve a supply | Reach and neighboring items | Reduce or relocate an awkward group |
| Flush and move normally | Controls, seat and projection | Change a conflicting location |
| Service access | Valve and tank-lid movement | Preserve access before filling shelves |
| Clean the area | Feet, rear pockets and removable bins | Choose a maintainable arrangement |
Record the full frame before adding contents
Keep the model drawing and installation instructions beside your fit record. Label the clear opening, brace locations, shelf depth and permitted adjustable positions. Over-toilet storage needs this full geometry when a frame arrives, because an outside-width description cannot answer whether all its members clear the fixture.
Record the tank lid removal path and required service access, then compare them with the correctly installed structure before filling toilet storage shelves. Keep any manufacturer-required access panels available. A record can help another household member recognize why an apparently empty area should remain clear.
Assign a lightweight suitable group to each intended shelf and include any container in the relevant load. Review over-toilet storage when contents change, keeping retrieval comfortable and the service route intact. Check toilet storage shelves with the actual users rather than a single height assumption. Preserve the model information so future cleaning, inspection or repair follows the correct instructions.
Questions about storage above the toilet
How high should the first shelf be?
High enough to preserve the actual tank, controls, lid-removal movement and ordinary use, while remaining reachable. Use the toilet and storage-unit documentation. A generic height quoted online cannot account for all tank designs or users.
Can I buy a unit without measuring its leg spacing?
Measure it first. Outside width and internal opening are different dimensions, and braces may introduce additional conflicts. Check the full drawing against the tank, toilet base and supply line.
Is a wall shelf always better for a renter?
No. It may need fixings and permission, while a standing unit may still require anchoring. Compare the permitted installation methods and actual room fit. Rental status alone does not establish which product can be safely installed.
What if storage prevents removing the tank lid?
Change the storage position or choose another product. Routine servicing should not depend on dismantling a furniture structure. Keeping the tank top free of loose decor is also useful, but that alone does not provide vertical removal space.